close

My Blog

My personal blog covers many unique topics, with a focus on rural life from a city perspective, innovative communication tips, and my life in video games.

My Blog

The Enchanted Forest Sanctuary: On-Site Cannabis Consumption, ’80s Vibes  &  Cinematic TV

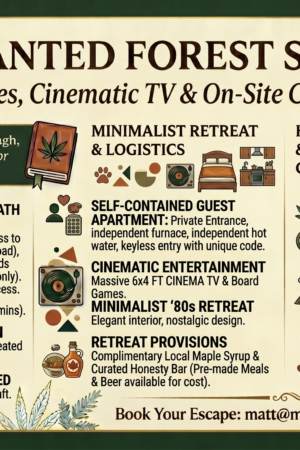
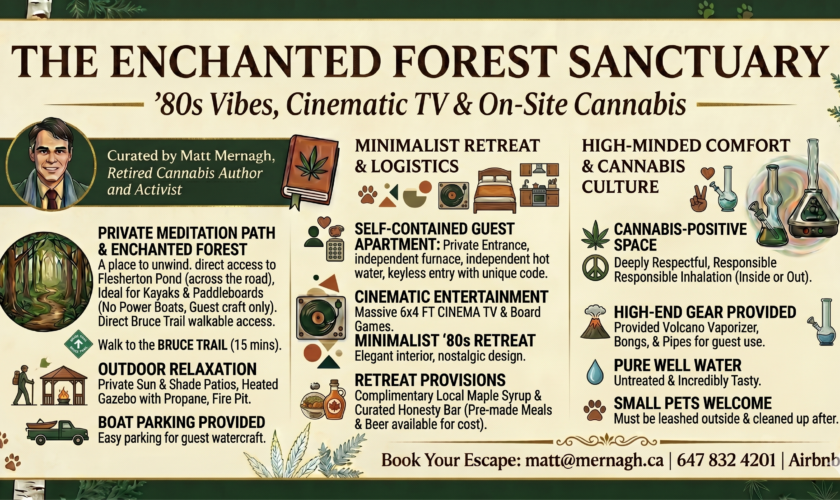
Welcome to a retreat designed for deep relaxation, natural immersion, and high-minded comfort. Owned and curated by retired cannabis author and activist Matt Mernagh, this self-contained 420 friendly apartment is a secluded forest sanctuary for couples looking to escape the noise and reconnect. Both with nature and each other.

The Interior: ’80s Minimalism & Cinematic Comfort

Inside, you’ll find a clean, ’80s-inspired minimalist aesthetic that prioritizes space and light.

  • The Cinema Room: Unwind after a day of hiking in front of our massive 6×4 ft guest TV. Perfect for an immersive movie night.
  • Seamless Arrival: Enjoy total privacy from the moment you arrive with secure keyless entry.
  • The Kitchen: Fully equipped with a fridge and microwave. We provide complimentary maple syrup made by Matt for your morning waffles.
  • The Bedroom: Minimalist newly painted room and lighting. Comfortable queen size bed.
  • Provisions: For your convenience, the fridge is stocked with Macleans, pre-made meals from K8R Foods in Markdale, and munchie items are available for purchase. So you never have to leave your bubble of solitude.

The Cannabis Sanctuary

As the home of a legendary cannabis activist, we offer a judgment-free, cannabis-positive environment.

  • Inhale freely, whether you prefer the cozy interior or the crisp forest air.
  • Top-Tier Gear: Guests have full access to a Volcano Vaporizer, as well as high-quality glass bongs and pipes.
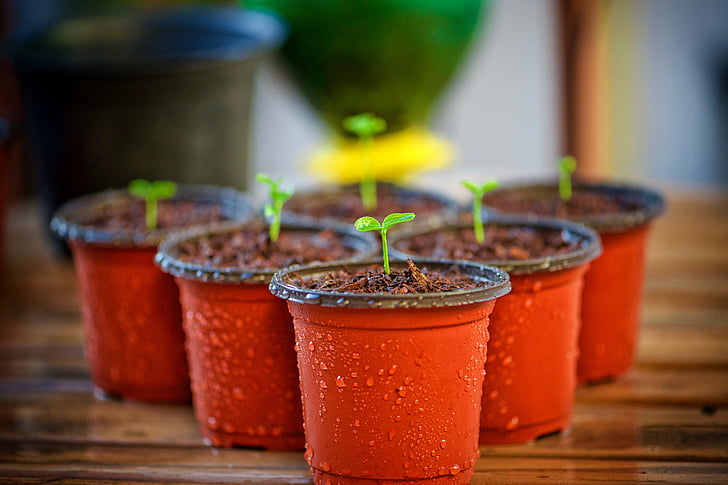
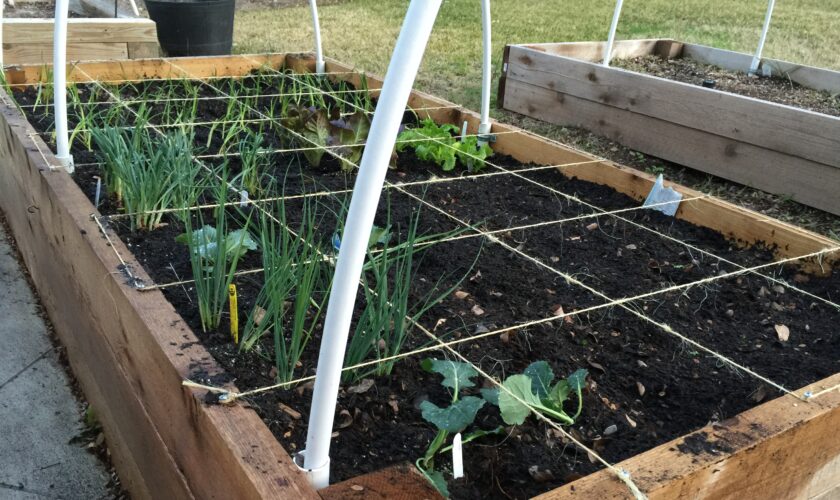
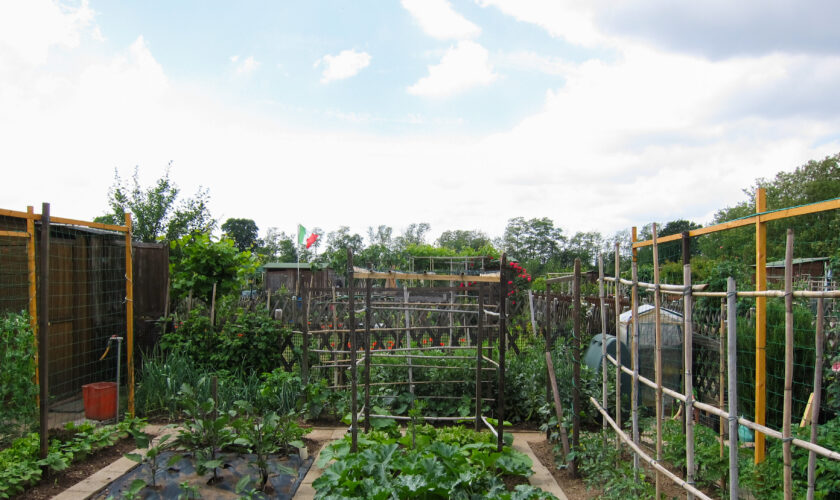
  • Grown on Site: Experience the property’s unique heritage with cannabis grown right here on the grounds. If Matt’s available, he’ll gladly tell you what’s growing this year.
  • No Smoking Unless It’s A Joint: House rules are simple – we toke cannabis here. 

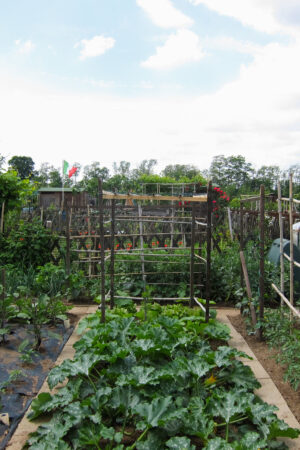
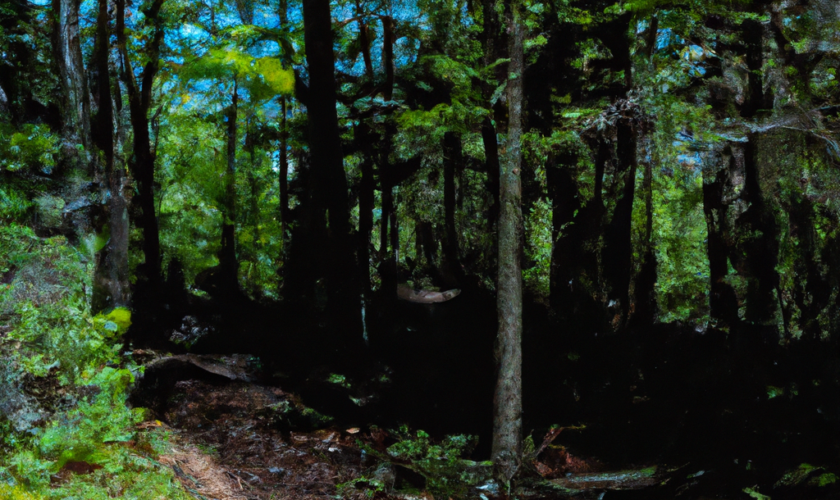
The Enchanted Forest & Waterfront

Step outside into our private woodland, featuring a dedicated meditation path that winds through the “Enchanted Forest.”

  • The Three 420 Friendly Patios: Choose your environment. With three distinct patio spaces, you can find the perfect patch of sun or a cool slice of shade at any hour of the day.
  • The Gazebo & Fire Pit: Enjoy the outdoors well into the evening with our propane-heated gazebo. There’s also a traditional fire pit. Both cannabis friendly.
  • Water & Trails: We are situated directly across from Flesherton Pond, ideal for a quiet morning of kayaking or paddleboarding (no power boats allowed, ensuring total peace). The legendary Bruce Trail and the stunning Lake Eugenia are both just a 15-minute drive away.
  • Private roadway: The house is located on a private road ensuring minimal traffic and noise.

Sustainable Luxury

We believe in protecting the forest we love.

  • Eco-Friendly: The suite is professionally cleaned using environmentally friendly products from The Good Clean, and all soaps are provided by Eco Refillery. Both local to Grey Highlands.
  • Pet Friendly: Small pets are welcome! We just ask that you pick up after them and keep them leashed while exploring the property.
  • Traveler Ready: Our driveway features dedicated boat parking if you’re bringing your craft for a day on Lake Eugenia.
  • Well Water: Forget bottled water. Our property is served by a private well providing some of the tastiest, untreated water in the region. 
  • Eco-Minded: We operate on a septic system and use only eco-friendly products to ensure we are as gentle on the land as possible.

Meet Your Host

Your host is the legendary Matt Mernagh, a retired cannabis author and activist (founder 420 Toronto). The quiet space has brought much peace to Matt, who has decided to open his “stoner sanctuary” for guests who are seeking a place to inhale freely in solitude. While Matt lives in the front half of the house, the apartment is entirely self-contained with its own furnace and hot water system. Matt’s presence ensures the property is well-maintained, but your privacy and solitude are our highest priorities.


House Rules

  • Two people max for a quiet relaxation weekend.
  • Small pets allowed (must be leashed outside).
  • Respect the silence: This is a space for solitude and nature.
  • Self Check-In: Anytime after 3:00 PM via keypad.

Read More
Rural Reflections from a Toronto Hipster

Understanding Your Soil Nutrients and pH

A Beginner’s Guide to Optimizing Your Soil Nutrients for a Thriving Garden

If you’re new to gardening, understanding your soil nutrients and pH is essential to growing healthy, vibrant plants. Soil pH is a measure of how acidic or alkaline your soil is, and soil nutrient levels determine what your plants can absorb for growth. In this guide, written by the AI Gardener and Matt Mernagh we’ll cover the basics of soil pH and soil nutrients and how to optimize them for a thriving garden.

Soil pH

Soil pH ranges from 0 to 14, with 7 being neutral. A pH below 7 is acidic, while a pH above 7 is alkaline. Most plants prefer a slightly acidic soil, between 6.0 and 7.0. If your soil is too acidic or alkaline, it can affect the availability of nutrients and the growth of your plants.

To determine your soil’s pH level, you can purchase a soil test kit or send a sample to a lab for analysis. If your soil is too acidic, you can add lime to raise the pH level. If your soil is too alkaline, you can add sulfur or other acidic amendments to lower the pH level.

Soil Nutrients 101

Plants require a variety of soil nutrients for healthy growth, including nitrogen, phosphorus, and potassium. These nutrients are often referred to as NPK and are listed on fertilizer labels. In addition to NPK, plants also require micronutrients, such as iron, magnesium, and calcium.

To determine your soil nutrient levels, you can also purchase a soil test kit or send a sample to a lab for analysis. If your soil is lacking in a particular nutrient, you can add fertilizer or amendments to improve its availability. However, it’s important not to over-fertilize, as this can lead to nutrient imbalances and harm your plants.

Improving Your Soil Nutrients

To optimize your soil for a thriving garden, you can take several steps to improve its pH and nutrient levels. Here are some tips to get started:

Amend your soil: If your soil is too acidic or alkaline, you can amend it with lime or sulfur to adjust the pH level. You can also add compost or organic matter to improve the soil’s structure and nutrient content.

Use fertilizers and amendments: Depending on your soil’s nutrient levels, you may need to add fertilizer or amendments to improve its availability. Look for fertilizers with the appropriate NPK ratio for your plants and consider using organic options, such as compost tea or bone meal.

Rotate your crops: Planting different crops in the same spot each year can deplete the soil’s nutrients and lead to nutrient imbalances. Consider rotating your crops each season to give the soil a chance to recover and replenish its nutrient levels.

Mulch your garden: Adding a layer of mulch to your garden can help retain moisture and prevent nutrient loss. Organic options, such as straw or shredded leaves, can also break down over time and add nutrients to the soil.

Practice companion planting: Some plants have natural relationships with each other that can improve the soil’s nutrient levels. For example, planting beans with corn can help add nitrogen to the soil, which is beneficial for both crops. Learn more about companion planting in this blog post.

In summary, understanding your soil’s pH and soil nutrients levels is essential to growing a healthy, vibrant garden. By testing your soil, amending it with appropriate amendments, and practicing good gardening practices, you can optimize your soil for a thriving garden.

Buy seasonal vegetable box from Roy’L Acres Farm.

Read More
Rural Reflections from a Toronto Hipster

Planting Seeds Indoors Tips

Before the Outdoor Planting Season

By planting seeds indoors, you can get a head start on the growing season and ensure that your plants are strong and healthy when they are ready to be transplanted outdoors. As the weather warms up, many gardeners are eager to start their planting season. However, depending on your climate, it may not be warm enough to start planting outdoors just yet. This is where planting seeds indoors comes in handy. In this blog post, by AI Gardener ChatGPT and Matt Mernagh we will provide some helpful tips for planting seeds indoors.

Choose the Right Time and Place to Plant Seeds Indoors

Before you start planting seeds indoors, it is important to choose the right time and place to do so. The timing will depend on your climate and the specific plants you want to grow. Generally, it is best to start planting seeds indoors 4-6 weeks before your area’s last frost date. This will give your plants enough time to grow and become strong before they are transplanted outdoors.

When choosing a place to plant your seeds, it is important to select an area that receives plenty of sunlight. This can be a windowsill or a grow light. Keep in mind that different plants have different light requirements, so be sure to research the specific needs of your plants before you start planting.

Properly Prepare and Care for Your Seedlings

Once you have selected the right time and place to plant your seeds indoors, it is important to properly prepare and care for your seedlings.

Proper care is critical for starting seeds indoors. When properly cared for your seeds will grow quickly and be ready for transplanting outdoors when the chance of frost has passed.

Here are some tips for planting seeds indoors

Choose the Right Soil: The soil you choose will have a significant impact on the growth of your seedlings. Look for a soil that is specifically designed for seed starting, as it will be light and airy, which is ideal for seed germination.

Monitor Temperature and Humidity: Seedlings need to be kept in a warm and humid environment in order to germinate and grow. Use a thermometer to monitor the temperature in your planting area, and consider using a humidifier to maintain proper humidity levels.

Keep the Soil Moist: Seedlings need to be kept consistently moist in order to germinate and grow. Water your seeds from the bottom by placing your containers in a tray of water, or use a spray bottle to mist the soil lightly.

Provide Adequate Airflow: Good airflow is important for preventing mold and disease from developing on your seedlings. Use a small fan or open a window to ensure that air is circulating properly around your plants.

By following these tips for planting seeds indoors, you can ensure that your seedlings will grow strong and healthy before they are transplanted outdoors. This will give you a head start on the growing season and help you to produce a bountiful harvest. So, don’t be afraid to get your hands dirty and start planting those seeds!

Buy seasonal vegetable box from Roy’L Acres Farm.

Read More
My BlogRural Reflections from a Toronto Hipster

Starting a Community Garden

starting a community garden

The Ultimate Guide to Creating a Sustainable and Vibrant Green Space for Your Local Community

Starting a community garden may seem daunting, but with proper planning and organization, it can be a fun and rewarding experience. Community gardens are a fantastic way to promote sustainable living, healthy eating, and community engagement. They can be a source of pride for your neighborhood and provide fresh produce for all members of the community. In this guide, we’ll provide you with all the information you need to get started.

Determine the Purpose and Goals of Your Garden

Before you start planning, it’s essential to determine the purpose and goals of your garden. Consider what your community needs and what type of garden would be best suited for your area. Will it be solely for growing fruits and vegetables, or will it also serve as a gathering place or educational space?

Find a Location for Starting a Community Garden

community garden

Once you have a clear idea of the purpose and goals of your garden, the next step is to find a location. Look for a space that is easily accessible and has enough sunlight, water, and soil quality. You may need to obtain permission from the local government or property owner to use the land.

Recruit Volunteers

Starting a community garden is a collaborative effort that requires a team of volunteers to help with planning, preparation, and maintenance. Reach out to local community groups, schools, and businesses to find volunteers who are passionate about gardening and community development.

Plan Your Garden Layout

The layout of your garden is crucial to its success. Consider the types of plants you want to grow, the space needed, and the layout of pathways, seating areas, and irrigation systems. Make sure to consult with gardening experts to ensure your garden is properly designed. To learn more about garden layout read our Plan Your Vegetable Garden for Maximum Yield.

Secure Funding for Starting a Community Garden

Funding is an important aspect of starting a community garden. You may need to seek out grants, donations, or sponsorships from local businesses or organizations to cover the costs of materials, tools, and supplies.

Get Your Garden Up and Running

Once you have secured your location, recruited volunteers, planned your layout, and secured funding, it’s time to get your garden up and running. Start by preparing the soil, planting your seeds or seedlings, and installing any necessary infrastructure. Make sure to establish a maintenance schedule and assign tasks to volunteers.

Engage Your Community in Starting a Community Garden

A community garden is not just about growing produce; it’s also about building community. Plan events and activities to engage your local community and raise awareness about your garden. Consider hosting workshops, garden tours, or community potlucks.

Conclusion

Starting a community garden is a fantastic way to bring your community together and promote sustainable living. By following these steps, you can create a vibrant and thriving green space in your neighborhood. Remember to plan carefully, engage volunteers, and involve your community in the process to ensure the long-term success of your garden.

Buy seasonal vegetable box from Roy’L Acres Farm.

Read More
My BlogRural Reflections from a Toronto Hipster

Plan Your Vegetable Garden for Maximum Yield

vegetable garden broken up into quadrants

In this post, we’ll discuss how to plan your vegetable garden for maximum yield. Growing a vegetable garden can be a fun and rewarding experience, but it takes more than just sticking a few plants in the ground and hoping for the best. To get the most out of your garden, it’s essential to plan your vegetable garden ahead and choose the right crops, layout, and planting techniques.

Plan your vegetable garden by choosing the right crops

One of the most critical factors in achieving maximum yield in your vegetable garden is choosing the right crops. Not all vegetables are created equal, and some will thrive in your garden’s climate, soil type, and lighting conditions, while others may struggle. Here are a few things to consider when selecting crops for your garden:

Soil type: The type of soil in your garden can impact the growth and yield of your crops. Some vegetables, like carrots and radishes, do well in loose, sandy soil, while others, like cabbage and broccoli, prefer heavier, clay-rich soil. Plan your vegetable garden according to the soil you will be growing in. Purchase a professional mix to achieve the best results.

plan your vegetable garden

Climate: Different crops prefer different growing conditions. Some vegetables, like tomatoes and peppers, thrive in warm, sunny weather, while others, like lettuce and spinach, prefer cooler temperatures. Determine the seasonal growing zone for your region and purchase seeds according to your grow zone.

Here’s a list of plant hardiness zones.

Lighting conditions: Most vegetables need at least six hours of direct sunlight per day to grow and produce a good yield. If your garden is in a shaded area, you may need to choose crops that can tolerate less light, like leafy greens and root vegetables. If trees are part of the shading problem, consider removing branches to create more sunlight as part of planning your vegetable garden.

Once you’ve identified the crops that will do well in your garden, it’s time to think about how to maximize their yield.

More tips to maximize your vegetable garden yield

The way you lay out your vegetable garden and plant your crops can have a significant impact on their yield. Spend time here when you plan your vegetable garden to determine where the best plants will be grown. Here are a few things to consider:

Companion planting: Companion planting is the practice of planting different crops together that complement each other and improve growth and yield. For example, planting beans and peas next to corn can help to improve the corn’s growth by adding nitrogen to the soil. When planning your vegetable garden, consider companion planting.

plan your vegetable garden

Crop rotation: Crop rotation is the practice of moving crops to different areas of the garden each year to prevent soil-borne diseases and pests. By rotating crops, you can also improve soil health and fertility, which can lead to higher yields over time. In the second year of your garden, plan your vegetable garden by moving the crops to different locations.

Spacing: Planting your crops too close together can lead to competition for resources and lower yields. Be sure to follow the recommended spacing guidelines for each crop to ensure they have enough room to grow and thrive.

Watering and fertilizing: Providing your plants with the right amount of water and nutrients is essential for maximum yield. Be sure to water your plants deeply and regularly, especially during hot, dry weather. You can also use organic fertilizers like compost and manure to improve soil fertility and boost crop growth.

In addition to these techniques, it’s essential to pay attention to the health of your plants and address any issues that arise promptly. Pests, diseases, and nutrient deficiencies can all impact crop yield, so be sure to monitor your garden regularly and take action as needed.

Conclusion

Planning your vegetable garden for maximum yield requires a bit of time and effort, but the results are well worth it. By selecting the right crops, using the right layout and planting techniques, and providing your plants with the right care and attention, you can enjoy a bountiful harvest of fresh, healthy vegetables all season long. So, roll up your sleeves, grab your gardening tools, and get started planning your vegetable garden today!

Buy seasonal vegetable box from Roy’L Acres Farm.

Read More
My BlogRural Reflections from a Toronto Hipster

Starting a Vegetable Garden Mistakes

vegetable garden

Starting a vegetable garden can be a fun and rewarding experience. Whether you’re growing vegetables for the first time or you’re an experienced gardener, it’s important to avoid common mistakes that can lead to disappointing results. In this blog post, written by ChatGPT and Matt Mernagh we’ll discuss common mistakes to avoid when starting a vegetable garden.

Starting a Vegetable Garden Begins with Planning

One of the biggest mistakes people make when starting a vegetable garden is not planning their garden before they start planting. Before you start digging and planting, take the time to plan out your garden. Decide what you want to grow and where you want to grow it. Consider the amount of sunlight each area of your garden receives and the amount of water your plants will need. You should also consider the type of soil in your garden and whether it will need to be amended.

Another important consideration when planning your garden is the layout. You should think about how you will arrange your plants so that they receive enough sunlight and don’t shade each other.

You should also consider the spacing of your plants to ensure that they have enough room to grow and don’t become overcrowded. I have a tendency to crowd my plants, especially the tomato plants.

When planning picture how big the plants will be at their full size, which can be challenging when they are so small to start.

Know the Best Time to Plant Your Vegetables

Different vegetables have different planting schedules, and it’s important to know when to plant each type of vegetable to ensure a successful harvest.

Many Canadians opt for the May long weekend as their default starting a vegetable garden date, but I personally use the long weekend to get the beds ready.

Then the following weekend or even during the week after work, I’ll starting planting.

Some vegetables, like peas and lettuce, can be planted early in the spring as soon as the ground thaws. Other vegetables, like tomatoes and peppers, need to be planted after the last frost of the season. You should also consider the length of your growing season when planning your planting schedule.

It’s also important to consider the climate in your area. If you live in a hot and dry climate, you may need to plant your vegetables earlier in the season to avoid the hottest part of the summer. If you live in a cooler climate, you may need to wait until later in the season to plant your vegetables.

Tips to Starting a Vegetable Garden

In addition to planning your garden and knowing when to plant your vegetables, there are other common mistakes to avoid when starting a vegetable garden. These include:

Overwatering or underwatering your plants: It’s important to water your plants regularly, but not too much or too little. Overwatering can lead to root rot, while underwatering can lead to stunted growth and a poor harvest.

Not fertilizing your soil: Your plants need nutrients to grow, and it’s important to fertilize your soil regularly to provide those nutrients. You can use compost, manure, or a commercial fertilizer to fertilize your soil.

Not controlling pests and diseases: Pests and diseases can quickly destroy your vegetable garden. It’s important to monitor your plants regularly and take action if you notice any signs of pests or diseases.

Neglecting your garden: Your vegetable garden needs regular care and attention. You should weed your garden regularly, water your plants as needed, and harvest your vegetables when they are ready.

Starting a vegetable garden can be a fun and rewarding experience, but it’s important to avoid common mistakes that can lead to disappointing results. By planning your garden before you start planting and knowing the best time to plant your vegetables, you can ensure a successful harvest.

Buy seasonal vegetable box from Roy’L Acres Farm.

Read More
My BlogRural Reflections from a Toronto Hipster

Companion Planting for Better Growth

example of three sisters companion planting

Companion planting is a technique used by gardeners to maximize their yields and create a healthier, more sustainable garden. By pairing vegetables with plants that complement their growth and deter pests, gardeners can increase their harvests and reduce the need for harmful pesticides. In this blog post, written by ChatGPT and gardener Matt Mernagh we will discuss the benefits of companion planting and provide tips on how to pair vegetables for better growth.

Benefits of Companion Planting

Companion planting has many benefits for vegetable gardens, including increased yields, reduced pest damage, and improved soil health. Here are a few reasons why you should consider pairing vegetables in your garden:

Increased Yields: Pairing vegetables can help increase yields by maximizing the use of space and resources in your garden. Some plants, like beans and peas, fix nitrogen in the soil, which can be beneficial for other plants like tomatoes and peppers that require nitrogen-rich soil to thrive. Pairing these plants together can improve soil quality and lead to bigger and healthier crops.

Reduced Pest Damage: Certain plants can repel pests that are harmful to vegetables. For example, marigolds emit a strong scent that repels nematodes, while garlic can deter aphids and whiteflies. Pairing these plants with vegetables can help protect them from pest damage and reduce the need for harmful pesticides.

Improved Soil Health: Companion planting can also improve soil health by adding nutrients and organic matter to the soil. For example, planting legumes like peas and beans can add nitrogen to the soil, while planting cover crops like clover and rye can improve soil structure and water retention.

Companion Planting for Better Growth

Now that you know the benefits of companion planting, it’s time to start pairing your vegetables. Here are a few tips to help you get started:

Plant Compatible Plants Together: When pairing vegetables, it’s important to choose plants that are compatible with each other. For example, tomatoes and basil are a classic pairing because they complement each other’s growth and flavor. On the other hand, planting fennel next to dill can stunt the growth of both plants. Do your research and choose plant combinations that work well together.

Consider Plant Height and Spacing: When pairing vegetables, consider their height and spacing requirements. Tall plants like corn and sunflowers can provide shade for shorter plants like lettuce and spinach, but they can also block their access to sunlight if planted too closely together. Be sure to leave enough space between plants to allow for proper growth and airflow.

Rotate Crops: To avoid depleting the soil of nutrients and reducing the risk of disease, it’s important to rotate crops in your garden. Pairing vegetables can help you plan your crop rotations more effectively. For example, planting legumes like peas and beans can help replenish nitrogen in the soil after heavy-feeding crops like tomatoes and peppers.

Plant Pest-Repelling Plants: To reduce the need for harmful pesticides, consider planting pest-repelling plants alongside your vegetables. For example, planting marigolds next to tomatoes can help repel nematodes, while planting garlic next to peppers can deter aphids and whiteflies. Do your research and choose pest-repelling plants that are compatible with your vegetables.

Pairing Vegetables for a Healthier Garden

Companion planting is a simple and effective way to improve the health and productivity of your vegetable garden. By pairing vegetables that complement each other’s growth and deter pests, you can increase your yields, reduce the need for harmful pesticides, and improve soil health.

Buy seasonal vegetable box from Roy’L Acres Farm.

Read More
My BlogRural Reflections from a Toronto Hipster

How to Create a Raised Bed Vegetable Garden

raised bed vegetable garden

A Step-by-Step Guide to Growing Your Best Garden Yet

Looking to take your gardening game to the next level? A raised bed vegetable garden might be just the thing you need! A raised garden offers a range of benefits, from better drainage to increased soil control. Plus, they’re a great option for those with limited space or poor soil quality. In this guide, written by ChatGPT and gardener Matt Mernagh, we’ll walk you through how to create your own raised garden in just a few easy steps.

Step 1: Choose your garden location

The first step in creating a raised bed garden is choosing the right location. Look for an area with plenty of sunlight and access to water. Keep in mind that raised gardens can be placed on any surface, including grass, concrete, or even pavement.

Step 2: Build your raised bed vegetable garden

Once you’ve chosen your location, it’s time to build your raised garden. You can purchase pre-made raised bed kits or build your own using lumber or other materials. I built my raised beds from recycled materials, and this is probably the cheapest method to building them. I highly recommend finding recycled materials to save costs. The most common size for raised beds is 4 feet by 8 feet, but you can adjust the dimensions to fit your space and needs.

Step 3: Add soil

raised bed vegetable garden
Raised Bed Vegetable Garden Image by wirestock on Freepik

After building your bed, it’s time to add soil. Choose a high-quality garden soil or create your own mixture using equal parts of compost, vermiculite, and peat moss. Though a bit more expensive, I would suggest Pro Mix. The additional costs ensures your raised bed will remain weed free.

A cheaper soil may unwanted weed seeds that will ultimately have you spending much more time weeding the garden. You can cut down on weeding by purchasing expensive soil.

Fill your bed with soil, leaving a few inches of space at the top.

Step 4: Plan your raised bed vegetable garden

Now that your bed is ready, it’s time to plan your garden. Consider the size of your bed and the needs of the plants you want to grow. You can use plant spacing charts and companion planting guides to help you plan.

Step 5: Plant your garden

Once you’ve planned your garden, it’s time to start planting! Dig holes in the soil and add your plants, spacing them according to your plan. Water your plants well after planting and continue to water regularly.

Step 6: Maintain your raised bed vegetable garden

To keep your raised bed vegetable garden thriving, it’s important to maintain it regularly. Water your plants regularly, weed your garden, and monitor for pests and diseases. Consider adding organic fertilizers or compost to your soil to help improve its nutrient content.

In summary, creating a raised garden is a great way to take your gardening game to the next level. By choosing the right location, building your bed, adding soil, planning your garden, planting, and maintaining it regularly, you can enjoy a thriving garden in no time. So what are you waiting for? Elevate your gardening game with a raised bed vegetable garden today!

Buy seasonal vegetable box from Roy’L Acres Farm.

Read More
My BlogRural Reflections from a Toronto Hipster

Hike Bruce Trail Tips From ChatGPT

Hike Bruce Trail #4 image by Dall E inspired by Tom Thompson

Our Hike Bruce Trail blog post is a pick-your-writing-style adventure. Choose from traditional blog style, Jack Kerouac is great for hikers influenced by Dharma Bums, Shakespearean, and my personal favorite gonzo journalism.

Plan ahead: Before heading out on your hike, make sure to plan your route and know what to expect along the way. This includes understanding the terrain, difficulty level, and any potential hazards or obstacles that you may encounter. Check weather conditions and plan for contingencies, such as carrying enough water and food, proper gear, and first aid kit.

Wear appropriate footwear and clothing: The Bruce Trail can be rugged, rocky, and wet in some sections, so it is essential to wear appropriate footwear and clothing. Choose comfortable, sturdy hiking boots that provide good ankle support.

Stay on the trail: It is important to stick to the marked trail to avoid getting lost, damaging the environment, or putting yourself in harm’s way. Always follow the trail markers, avoid cutting switchbacks, and respect private property boundaries.

Take breaks and hydrate: Hiking can be a strenuous activity, especially on the Bruce Trail, where you may encounter steep inclines and rocky terrain. Make sure to take frequent breaks, stay hydrated by carrying enough water, and eat energizing snacks to keep your body fueled throughout the hike.

Respect the environment: The Bruce Trail passes through some of the most beautiful natural landscapes in Ontario, so it is important to treat the environment with respect. Avoid littering, stay on the trail, and avoid disturbing wildlife or their habitats. Leave no trace and help preserve the beauty of the trail for future generations.

(more…)
Read More
My BlogRural Reflections from a Toronto Hipster

Growing Big Tomatoes Guide

grow big tomatoes image style of andy warhol

Growing big tomatoes requires more than just planting the tomato seeds and hoping for the best. In this blog post, we’ll explore some tips and techniques for growing big tomatoes that are sure to impress your friends and family.

Choose the right variety
The first step in growing big tomatoes is to choose the right variety. There are many different types of tomato plants available, each with its own unique characteristics. Some varieties are more suited to producing large, meaty fruits while others are better for producing smaller, sweeter fruits. Look for varieties such as Brandywine, Mortgage Lifter, or Beefsteak that are known for producing large, flavorful tomatoes.

Start with healthy plants
Growing big tomatoes requires healthy plants, so it’s important to start with high-quality seedlings or transplants. Look for plants that are well-established with sturdy stems and healthy leaves. Avoid plants that look wilted or have yellowing leaves, as these are signs of disease or stress. It’s also a good idea to choose plants that are stocky and not too tall, as they will have a better chance of supporting the weight of large fruits.

big red juicy tomato
Growing big tomato image composed by Dall-E prompt by Matt Mernagh

Growing Big Tomatoes Requires Plenty of Sunlight

Tomatoes love sunlight and need a minimum of six hours of direct sunlight each day to thrive. Choose a location in your garden that receives plenty of sunlight and is protected from strong winds. If your garden doesn’t receive enough sunlight, consider using a grow light to supplement natural light

Use a high-quality soil mix
Tomatoes require nutrient-rich soil to grow big and healthy. Use a high-quality soil mix that is enriched with organic matter such as compost, worm castings, or aged manure. This will help to provide your plants with the essential nutrients they need to produce big, juicy tomatoes.

Water regularly
Tomatoes need consistent moisture to grow, so it’s important to water them regularly. Aim to keep the soil consistently moist but not waterlogged, as this can lead to root rot. Water deeply once or twice a week, depending on the weather conditions. During hot, dry weather, you may need to water more often.

Provide support
As your tomato plants grow and start to produce fruits, they will need support to prevent the weight of the fruits from breaking the stems. There are many different types of supports available, including cages, stakes, and trellises. Choose a support system that is sturdy and able to support the weight of large fruits.

Tomato by Dall-E prompt Matt Mernagh

Prune your tomato plants

Pruning your tomato plants can help to improve the overall health of the plant and increase the size and quality of the fruits. Remove any suckers that develop in the crotch between the main stem and branches, as these can divert energy away from the fruit-producing parts of the plant. Also, remove any leaves that are blocking sunlight from reaching the fruits.

Fertilize regularly
Tomatoes require regular fertilization to produce big, juicy fruits. Use a high-quality fertilizer that is specifically formulated for tomatoes and follow the recommended application rate. Over-fertilizing can lead to excessive foliage growth and smaller fruits, so be sure to use the recommended amount.

Monitor for pests and diseases
Tomatoes are susceptible to a wide range of pests and diseases, which can impact the size and quality of the fruits. Keep an eye out for common tomato pests such as aphids, whiteflies, and tomato hornworms, and treat them promptly if you notice an infestation. Also, be on the lookout for common tomato diseases such as early blight and blossom end rot, and take steps to prevent

Read More
1 2
Page 1 of 2